Tuesday, September 10, 2013

walnuts are not just for eating...

...they're for inking, too!

some goodies came in today from a good friend who shopped online with me. (yay!) there's a couple of inks,

and a few nibs to try out and play with.

i'm usually more excited about nibs, but today, i was most curious about the walnut ink. probably because it's my first time to try ink that wasn't liquid yet. it's in crystal form that should be dissolved in water. i guess the 'play' factor there is the plus.  

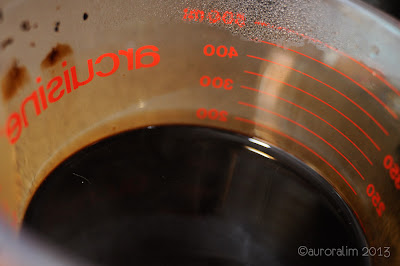
so as soon i had the time, i went for the kitchen for some warm water which is supposed to help dissolve the crystals faster.

then, i measured out a couple of teaspoons... (i later adjusted it to 2.5 tsps. you can add more to make it darker or dilute it for lighter washes, dyeing and antiquing paper and even fabric)

and dumped it in the warm water...

a few minutes later, voila... 

it smells kinda nice too. like the bark of a tree. (if you like that sort of thing, like me)

i first became interested in it because of the ruling pen i was trying to learn to use. practicing with it uses up a lot of ink (and paper!) since the letters are so big. i needed cheap ink that i wouldn't feel guilty wasting, especially since my letters aren't something to be proud about yet.

so i tried a few scribbles with it... i love how it looks! it feels very organic (duh! it IS organic!) and old world-ish. just right up my alley. 


i liked the way it flows smoothly from the nib. also, it FEELS like a single dip goes a long way (i have yet to test that against other inks). it's a nice transparent warm brown color and i'm digging the way there seems to be outlines at the sides of the letters. 


i put it in a nice container i recycled from sesame seed salad dressing that perfectly fits 1 cup of the ink solution. 

best thing about it is that it looks like that 4 oz package ($7.20 at Paper & Ink Arts) will go a long, long way. the only downside i can see to it is that while this ink is said to be pretty light-fast and is acid-free, it is NOT waterproof. that may be a deal-breaker for calligraphers who want the permanence of waterproof inks.


but for calligraphy practice and even for drawing/sketching, it is pretty much the least expensive ink that's hard to beat for practicality.

Sunday, August 25, 2013

pretty Sailor brush pen

been a while since i last posted in this blog. life has been busy and well, there's Facebook to get in the way of blogging. recently though, i've been thinking if i can revive ye olde blog if only because i've been bitten by a new bug... calligraphy!

but that's another story. for now, i just want to make a review about this pretty little thing called the Sailor Yubi Maki-e brush pen. i was attracted to it because calligraphy guru Fozzy Dayrit-Castro, used it and posted her lettering with it at the Fountain Pen Network-Philippines FB page. i think anything she uses, i start to drool over. you can't blame me though. head on over to her blog and see for yourself why.

long story short, i head on over to the Shangri-La Mall branch of Scribe, the local distributor of Sailor pens. The Maki-e brush pen is available in 3 designs at Scribe but i think there are 4 designs and 3 colors. Mine is the one with the iris flowers and dragonflies. i really wanted the one with the peonies and butterflies also but i can afford only one. it retails for Php1,795.00 (about US$39.-) not exactly cheap for a brush pen but not really too expensive either considering the quality. below are the photos.


this is the packaging which is kind of nice, even for a relatively inexpensive pen--a black carton sleeve with gold stamping and a black plastic flip-top box. my only complaint is that the box does not have a snap lock. you would need the carton sleeve to keep it closed.


the box is shallow but it has a suede (or velveteen?) lining. it comes with one black ink cartridge. you can use it with a Sailor converter but you have to buy that separately.


i think the ones that present best are the black resin pens over the red and white ones because the black background shows off the maki-e designs better.


the Iris flower design from one angle...


 and another angle... (note the really pretty glittery iris flowers)


and another angle. the irises here have interference colors, which means it changes color (blue to violet) depending on how the light hits it.


here is how the brush point looks. it's so good!... very responsive and snappy and well, pointy. i think the very tip is one, just one hair thick! it holds up very well to writing though. but i always gingerly close the cap for fear i'd ruin that nice tip.

i did not use the black ink cartridge yet. i wanted to try it first as an eyedropper pen. that way, it holds more ink. the barrel can fit almost 3ml of ink although i did not fill it that much. i applied silicone grease to the threads and waited for the brush to saturate with it. that takes a while. i didn't exactly time how long but it took about 15 minutes because i loaded it before dinner and when i came back after, it still wasn't loaded up. i had to dip the brush in the ink to charge it and then the flow inside eventually caught up.

below are some writing samples. please excuse the mess. i tried to do it justice but i think it will take more practice before i can really do that. the ink i used is Noodler's Black Swan in Australian Roses.


i like that gold cap band very much because it has the characteristic Sailor lettering and makes the pen look more expensive than it really is.


so, is it worth the buy?... for the pretty good looks and the snappy brush and point... yes, oh yes!

Wednesday, May 16, 2012

Lamy Vista eyedropper


most fountain pen aficionados would know what would motivate a pen freak lover to experiment with something not natural to a pen engineered with a modern filling system and convert it to a primitive eyedropper-style pen. but for those wondering why, it is usually because of 3 simple reasons:
  1. ink capacity - converters are smaller than the barrel itself for ink. therefore, one needs to refill more often with a converter, especially with broader nibs. this eyedropper conversion makes the Vista carry 3ml of ink instead of just half a milliliter or so.
  2. it's prettier - i like seeing all that beautiful colored ink moving around in a demonstrator (clear) pen barrel. 
  3. just for the fun of it - what else are you going to do with a pen except write? converting makes you do something else with it. it's playtime.
i first heard about converting the Lamy Vista demonstrator from my "suki" salesperson Rose at the National Bookstore closest to my place. she said all i needed was the Vista Rollerball barrel. for Php 475.00 (which is about US$11.00), i ordered one last December as a spare part. it arrived just last weekend.

since i am all in an excited bunch awaiting the arrival of the latest Lamy Safari limited edition 2012, it was welcome news to know that i can now stave off my longing for it by picking up my RB barrel and of course, a Lamy Vista and taking it to town. i also really, really wanted to use my Iroshizuku Chiku-rin alreadt. i was actually looking forward to the apple green 2012 Safari because it's a great match for it. but since, its not yet available in the Philippines, i might as well ink up the Vista with it. yey!

so i excitedly dropped by National last Saturday to pick up the barrel and the Vista that suki texted in. i even threw in a 1.1 italic nib knowing the Chiku-rin is on the light side of inks and looks best with a bigger nib. i actually tried it first on my apple green Prera with fine nib. it didn't work well because it was too light. as a nice surprise, suki Rose also gave me a Lamy notebook as a free item for my purchase. gotta love Rose! the notebook is a winner.

it's a small but handsomely presented notebook. not sure if it's real leather or faux, either way it looks good to me.

the Analog Dog couldn't resist "marking"it.

my favorite on a notebook are graph lines so this is such a winner for me.

here's a video of how i did the simple conversion. i also had some fun trying out a stop-motion style video blog. so for that also, the Vista is well worth the price for the fun i had with it. and that is not to mention what a great, functional, workhorse of a pen the Lamy Vista is. most everybody probably know that, considering the long reputation Lamy Safaris (the Vista is a clear body variant of the Safari) have for many years already. 


as for the Selley's Epoxy Fix, i think only time will be the best judge if this is a good adhesive to use for this purpose. initially though, it looks like a good match. i actually first thought i'd just use the regular silicone sealant. i went to Ace Hardware to get one but sitting right beside the sealants were the epoxies. i didn't know there was a clear epoxy so when i saw it -- and it was cheaper too being in a smaller tube, this one costs Php 89.75 -- i went ahead and inspected it. i almost didn't take it after reading that it was not recommended for polyethylene and polypropylene plastics but it was recommended for "many rigid plastics, glass, metal, ceramics and wood". the Lamy clear plastic barrel is what material???... i remember the colored Safaris are made of ABS plastic but i'm not sure about the clear Vista. Considering i would be possibly be ruining a P475.00 barrel that took 5 months to arrive, i hesitated a bit. the silicone sealant is a safer bet, i knew i stand a better chance of safely removing that adhesive without marring the clear finish if i make a mistake because silicone sealants are soft and flexible. however, i also don't like that it is flexible for this pen either. i'll probably play with it and eventually pull it off.  i also think there's a higher chance it will eventually stain from the ink.

so left with not much choice, i took home the Epoxy Fix. i love that it dries clear and rigid. it looks like it belongs with the pen and does not stand out. probably the only giveaway that it was put there is that on closer inspection, you will see tiny bubbles that hardened inside. but on the surface, it is clear and smooth.
another thing i'm enjoying on this pen is the 1.1 italic nib. it's my first italic nib, with a Lamy at least. my other nib(s) that is italic is on a Rotring Artpen Calligraphy set, which has a 1.1, a 1.5 and a 1.9mm. however, i don't really use it for everyday writing since the pen is long-ish, being calligraphy style. i'm not really a fan of broad nibs for everyday writing, my handwriting looks terrible with it because i write fairly small. but, this 1.1 italic is perfect for me, even as a regular writer. i can write fast with it and my handwriting looks decent enough. when my green 2012 Safari arrives, i will probably switch the nibs and the ink to match that pen and refill this Vista with another color. 

side by side with Rotring Artpens.

but definitely, i shall be getting another 1.1 italic/stub one of these days. maybe i'll try a TWSBI 1.1 next. it should be on my (future) Vac700 or Mini. so, here's to looking forward!  

here are a more shots beside a TWSBI 540 for comparison:


Writing samples:

feeble attempt at italic writing. needs a LOT more practice.

my regular writing works better with this 1.1 nib than a broad.

Saturday, February 11, 2012

the impressive TWSBI Diamond 540


sometime in December of last year 2011, i found out a good friend was coming home from the US. so, as usual, i had to ask if he can do me a favor and bring home a small item for me. when it comes to pens, it is usually a simple and inexpensive matter to have it shipped directly to me but i could not order this pen myself since the Ebay site of TWSBI won't ship to the Philippines. i usually do not even order from sites like this (i can't help but feel a bit slighted) because i do not think it is particularly problematic to ship to here. i have done it many times with no issues thus far. however, i had to make an exception with this pen. judging from all the reviews and from an earlier version, the TWSBI 530, which i have seen from one of the penmeets here, i KNEW just *had* to have one.


even the packaging was impressive.


Link it looked expensive and well-made. (but it costs just US$50.00 before shipping). i also find those 2 clear, plastic "anchors" that latches the pen very securely in its box pretty cool. there was even a wrench and a small bottle of silicone grease underneath that white hood. impressive, eh? and that is because this pen can be completely disassembled for cleaning (and i suppose, for parts replacement if needed) see it on my unboxing video down below or click the link to watch on youtube.


once you get it inked up, you fall even more in love with it because, being a demonstrator pen, it displays a lovely ink color very well. i loaded it up here with one of my most favorite, the Pilot Iroshizuku in Yamabudo color.

you can already probably guess by how gushy and enthusiastic i am about this pen that not only does it look good, it writes smoothly too. my nib here is an F and i am in love with it. i have a feeling it will stay for a long time in my daily pen arsenal.


*** my unboxing video ***

Thursday, December 15, 2011

the incredible Bulk

uhhh, FILM, that is... 100-ft. bulk film roll.

i thought 135 film for analog cameras existed only in the usual 'cartridged' form. you know, the kind that are available these days as 36-shots-per-roll film encased in a hard shell. they also used to come in 24-shot and 12-shot rolls but i hardly find them in this form anymore in these times when digital photography rules. film also used to exist in many sizes and shapes. there used to be 110, 120, 220 and Advantix. i think there may also be other forms i am not aware of. these days, only 135 and 120 are available and they are not exactly cheap.

if you are inclined to explore film photography, you might start feeling the expense and the lack of choices when it comes, at least, to the more popular 135 form. here is where acquiring film in bulk may come in handy.


i first heard about this from another film photography enthusiast friend, Miko, who happened to mention that he rolls his own film. that got me curious and googling and, long story short, i eventually found me a daylight film loader and some reloadable film cartridges on Ebay. the 100 ft bulk film rolls are not readily available in the Philippines either so i hitched an order with some online friends who "group buy-ed" from BH [thanks Francisco Bal!]. i thought i'd try the cheaper Ilford HP5+ while the others went for the Kodak TriX film. you can check out the vid below on how i first rolled my own. please pardon the fumbling.


Related Posts Plugin for WordPress, Blogger...